DNS Management
This guide explains how to manage DNS records for your registered subdomains using the dashboard's DNS → Manage DNS interface.
Overview
Use the DNS management UI to add, edit, and remove DNS records for your subdomain. Typical record types include A, CNAME, TXT, MX, and SRV.
Steps — Manage DNS via Dashboard
- Log in with GitHub and open My Domains.
- Click the domain/subdomain you want to manage.
- Choose DNS → Manage DNS.
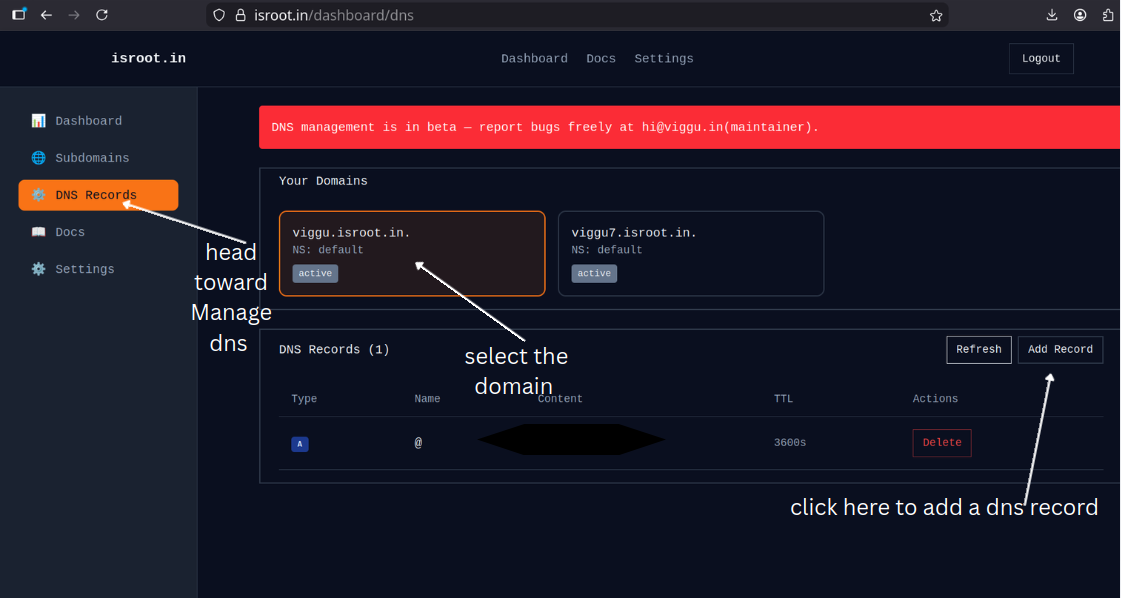
- Click Add Record and choose the record type.
- A: Points a name to an IPv4 address (e.g.,
@ -> 203.0.113.1). - CNAME: Points a name to another name (e.g.,
www -> example.com.). - TXT: Add verification or other text records (e.g., for SPF, domain verification).
- A: Points a name to an IPv4 address (e.g.,
- Enter the Name, Value, TTL (use default if unsure), and save.
Examples
- Add an A record for
project.isroot.inpointing to203.0.113.1. - Add a CNAME for
www.project.isroot.inpointing toproject.isroot.in. - Add a TXT record for domain verification (e.g.,
google-site-verification).
Propagation & Verification
- DNS changes can take minutes to propagate but may take up to 24–48 hours depending on TTL and caching.
- Verify changes using
digornslookup:dig A project.isroot.inordig CNAME www.project.isroot.in.
Cloudflare notes
- We are not available in PSL yet, so you’ll need to wait to be onboarded to Cloudflare.
Troubleshooting
- Record not appearing? Clear DNS cache or wait for TTL to expire.
- Wrong IP or CNAME? Double-check record values and trailing dots for CNAMEs when required.
- Nameserver mismatch? Ensure your DNS provider's nameservers are set correctly at your registrar or in the domain settings.
Need Help?
If you run into issues, check the Troubleshooting guide or contact Support (see Getting Started for support links).